 Jake Robbins Engineering builds a Brough Superior from the ground up…
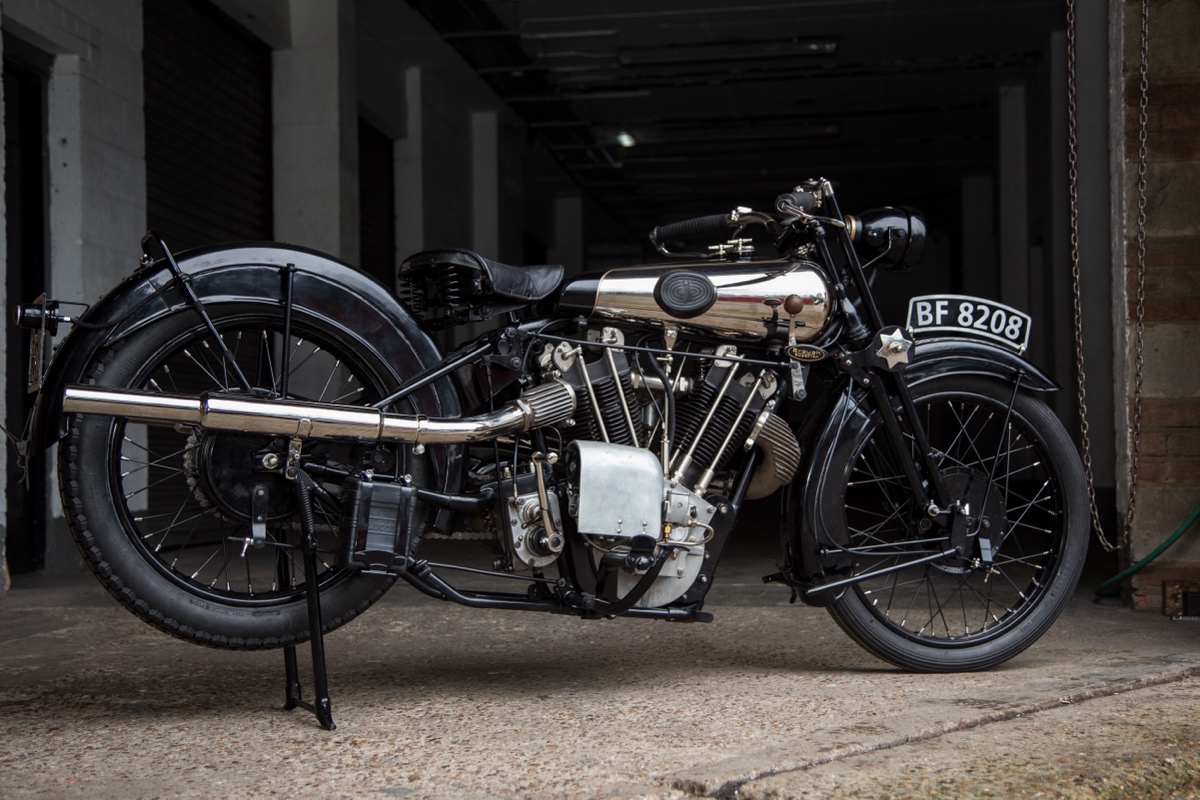
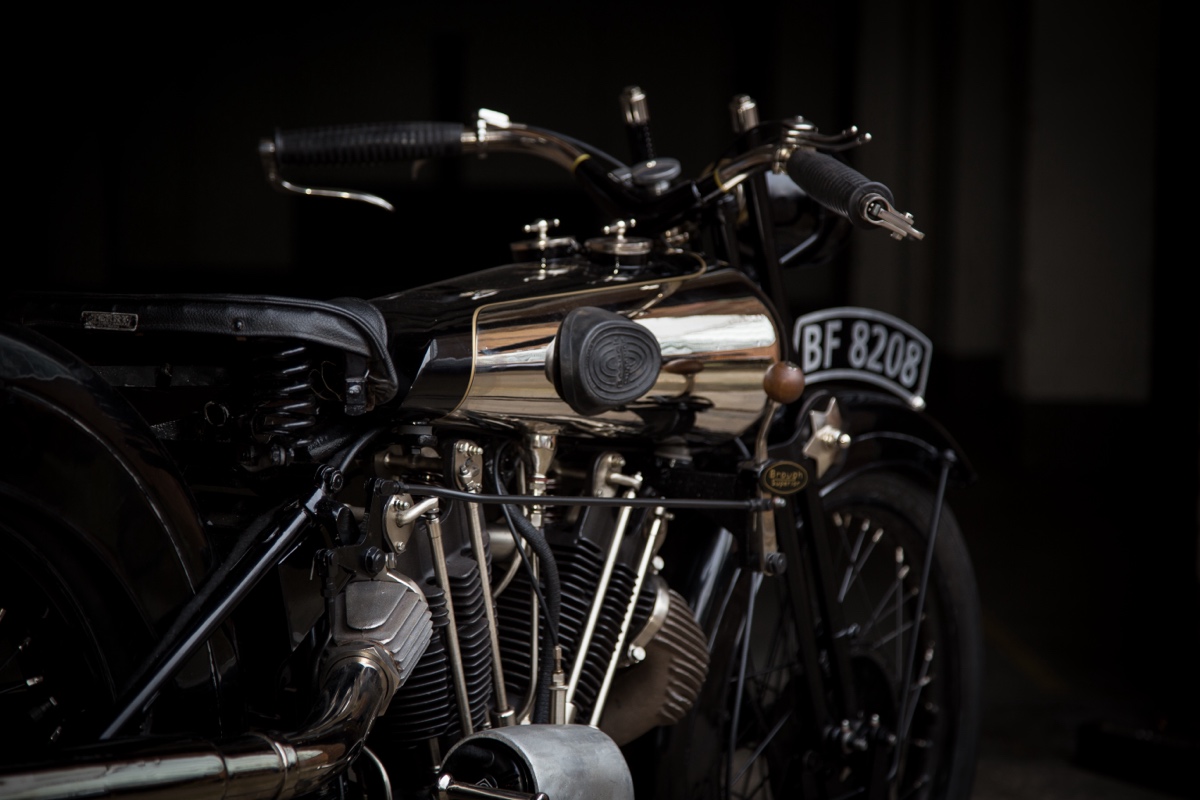
In the hallowed annals of motorcycle lore, few pre-war machines garner as much respect and admiration as the Brough Superior SS100. Introduced in 1924 and marketed as the “Rolls-Royce of Motorcycles” — with the famed automaker’s consent — each SS100 was hand-built by George Brough and team in their Nottingham workshop…twice. The ~980cc overhead-valve JAP V-twin engine was incredibly powerful for the era.
“Each motorcycle was assembled twice, firstly to fit all the components and tailor the machine to the customer. It was then disassembled for painting, plating and polishing before re-assembly. Each SS100 was tested at the Brooklands circuit and delivered with a certificate stating it had been timed at 100mph or more.” –Bonhams
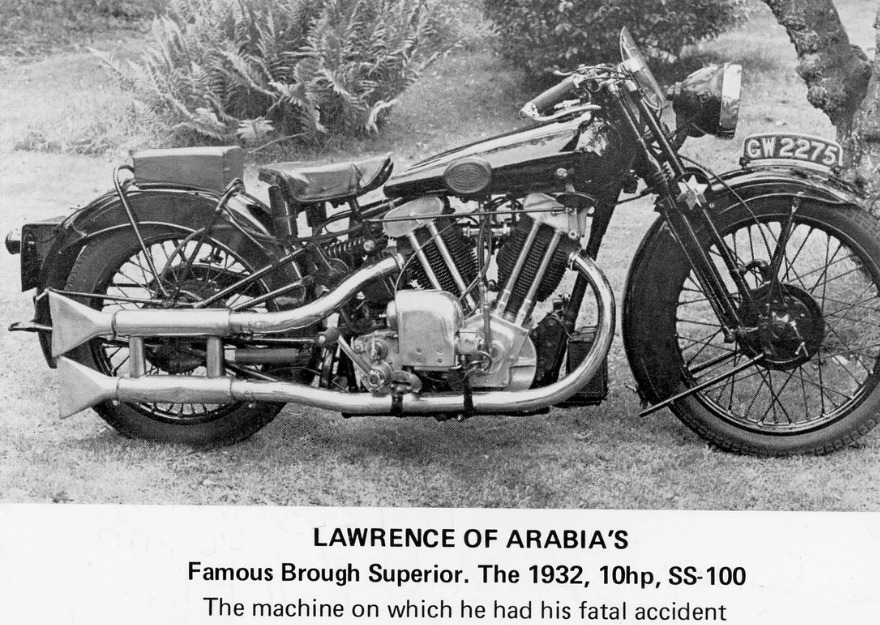
Of course, in the 1920s very few vehicles could reach the mighty ton, and the SS100 became a legend in its own time, attracting all sorts of high-profile enthusiasts and adventurers. T.E. Lawrence — aka Lawrence of Arabia — was one of the first buyers of the new machine, and only 383 SS100 models were ever built.
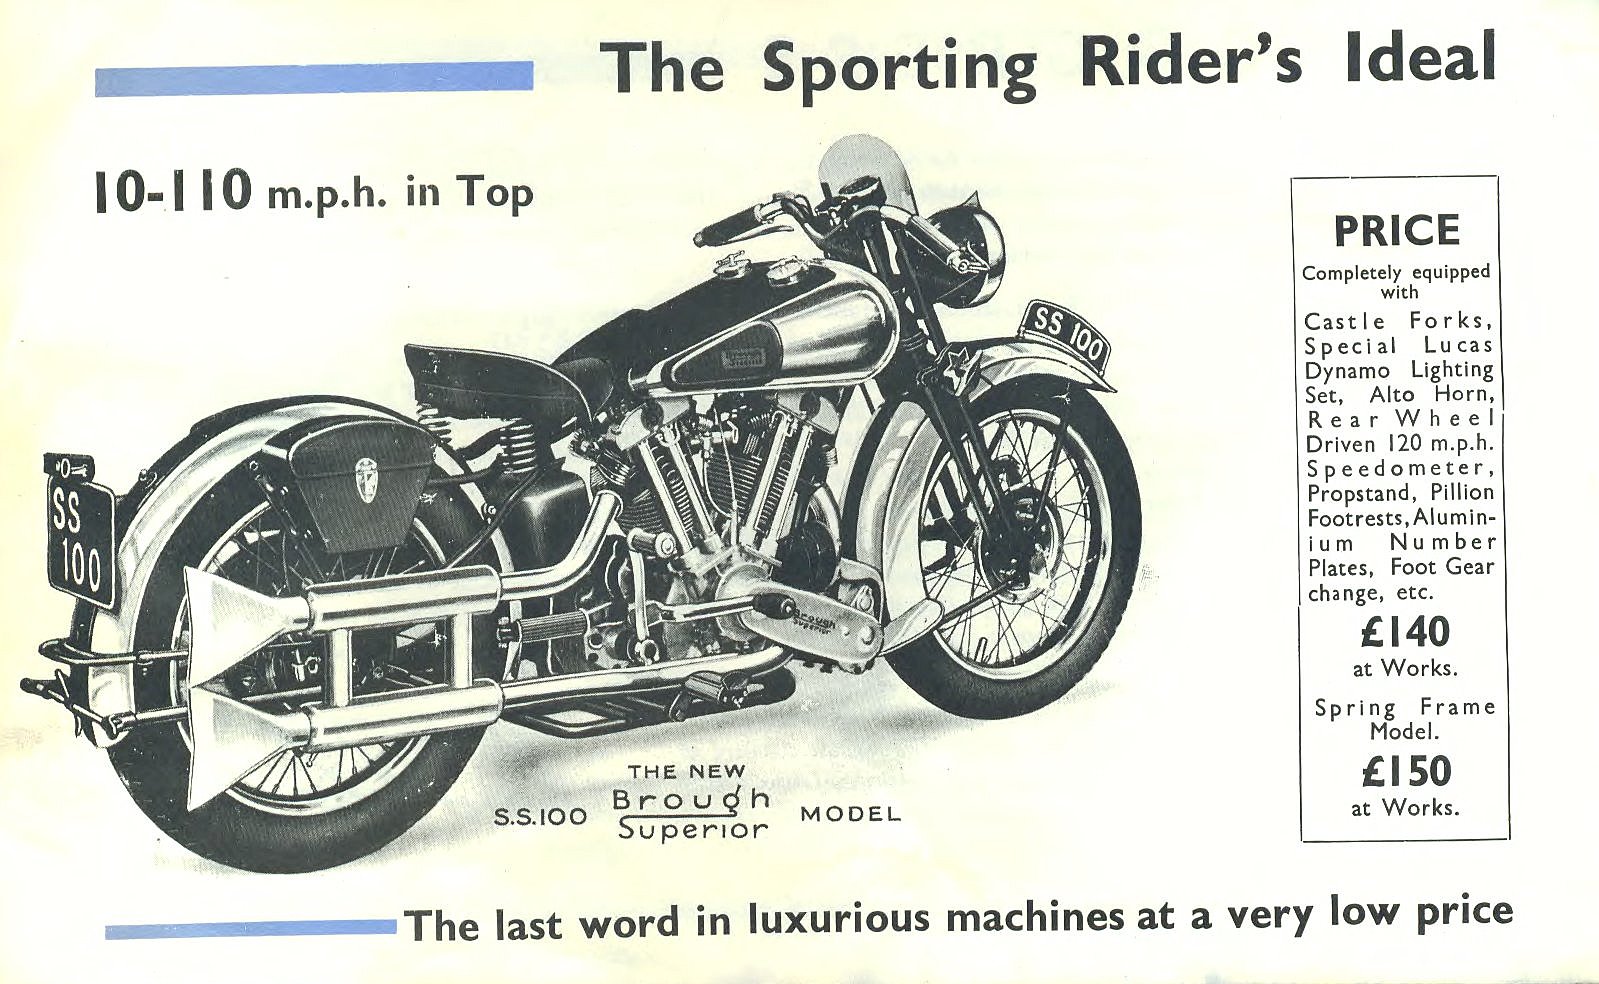
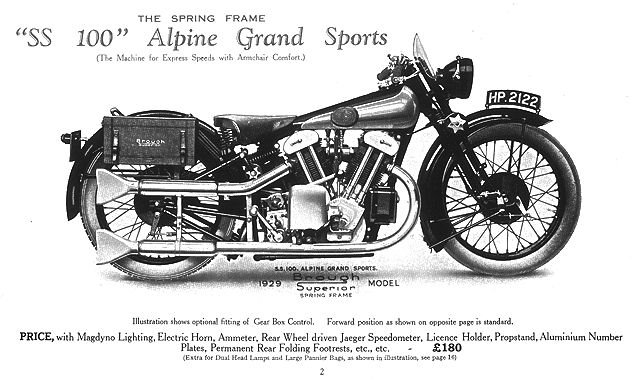
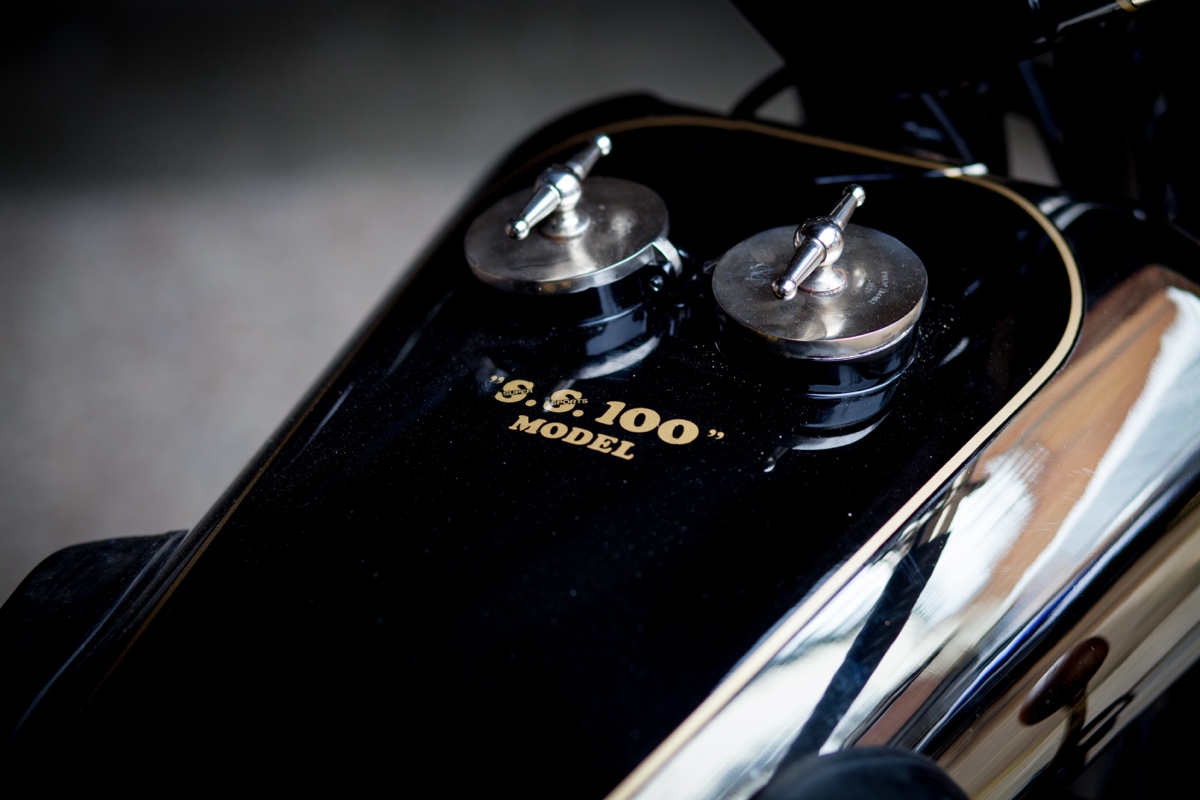
In 1925, the SS100 Alpine Grand Sport was introduced, a touring model named in honor of the Brough Superior’s success in the 1925 Alpine Trial, where a team of six SS100s — one ridden by George Brough himself — dominated the event. It was advertised as “The Machine for Express Speeds with Armchair Comfort.”
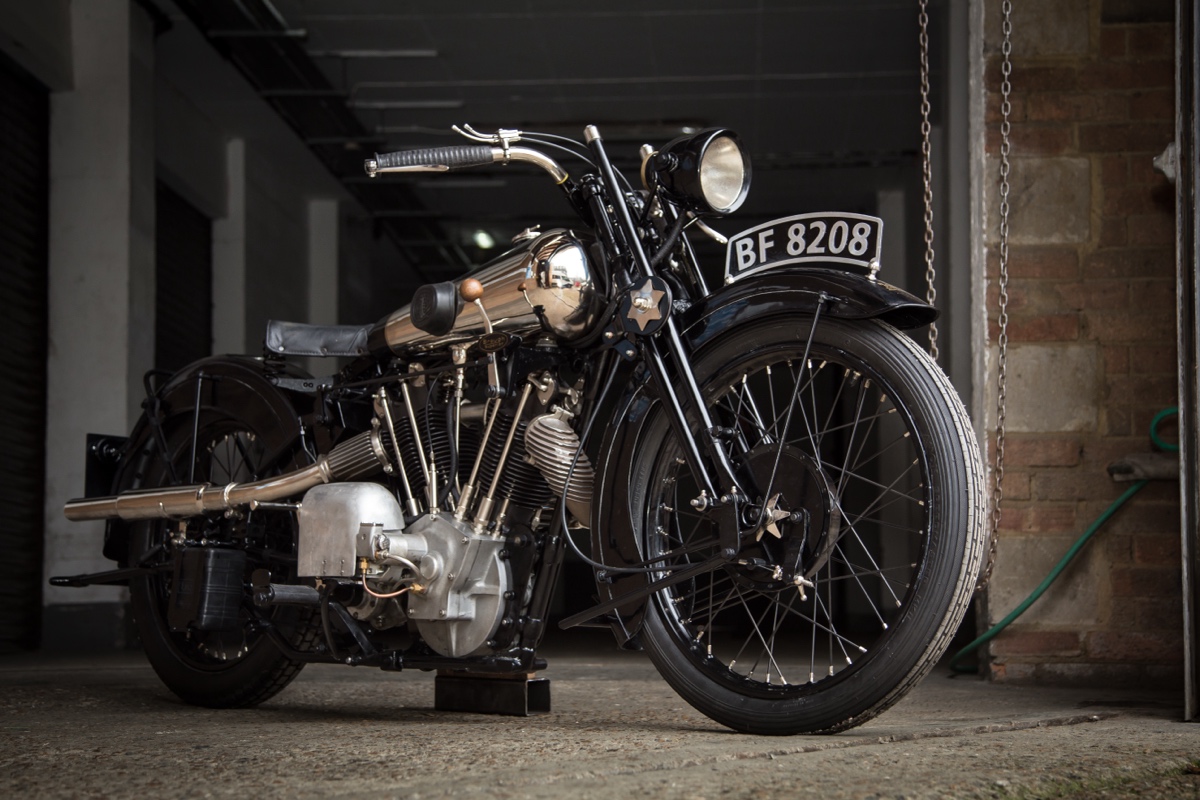
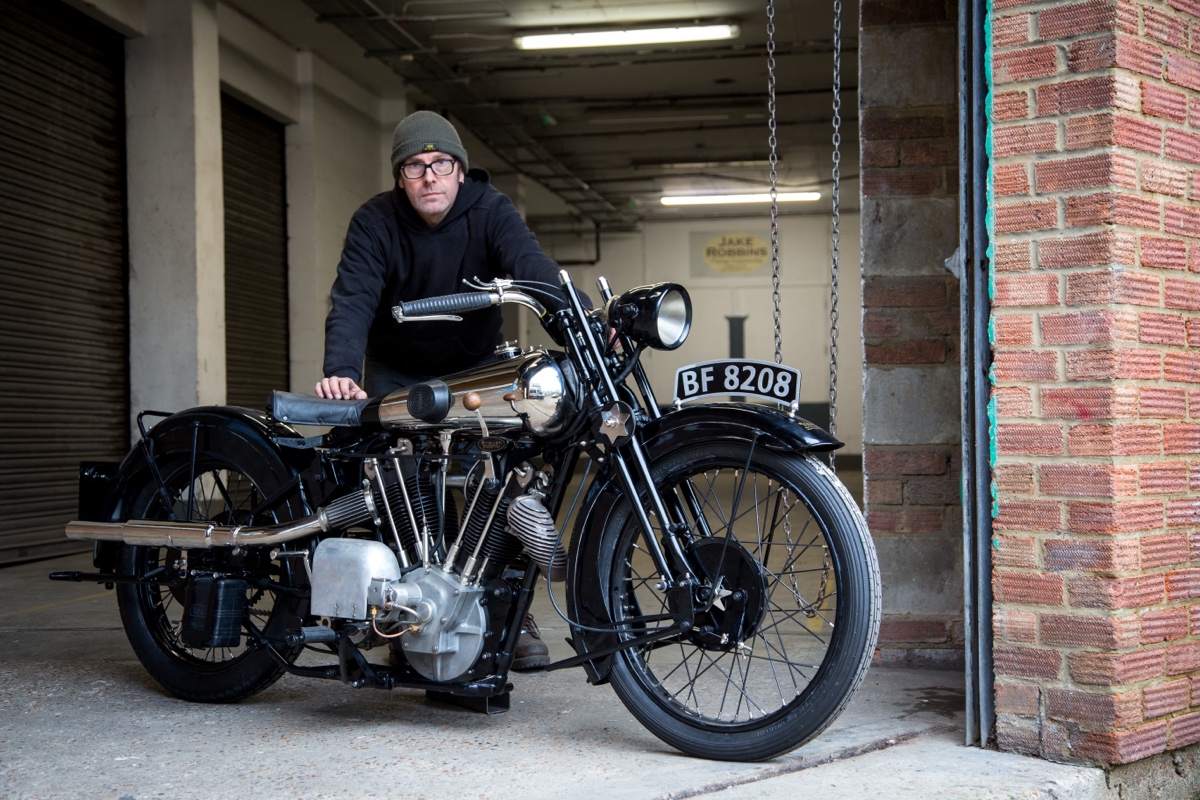
Today, only about 70 SS100 models are thought to still exist, and they regularly sell for more than a quarter million dollars at auction. The bike you see here comes from Jake Robbins and his son William of Jake Robbins Vintage Engineering (@jakevintage), who had the very rare opportunity to build an SS100 from the ground up using a single collector’s jumble of SS100 parts…many of them stored in vintage biscuit, milk, and shortbread tins!
Few builders would have the expertise, perseverance, attention to detail, and connections with other specialists to tackle such a project. However, the Robbins have built their reputation in the world of Brough Superiors and pre-war motorcycles in general, fabricating reproduction Castle forks as well as carrying out full restorations and building specials.
“I tried to build the orders in a production style but soon discovered that very few of the Broughs built during the 1920s era were the same; it seemed the models built during the 20s were in perpetual development or being built to order. Perhaps George Brough was the pioneer of custom building — a conclusion I am sure I am not the first to come to…”
In this case, the customer, David Saunders, who’d bought the collection of parts, wanted a bike that could actually be ridden, not just enjoyed with the eyes.
“We have aimed to build a bike for riding not hiding, we took on some of the issues the age of these bike present with most parts used are replaceable or repairable so this bike like its predecessors can go on for the next hundred years…” -Jake Robbins

The process was incredibly laborious, with many, many parts fabricated from scratch. Jake details the entire journey below in a most comprehensive fashion. Meanwhile, his friend (and ours), Shaun Fenton of Hoxton Moto, has made a short film (below) about the build, which we highly recommend.
Hats off to Jake and William for breathing life into this vast collection of parts,
“It’s hard to put into words the feeling you get from riding a motorcycle you have built, especially after all those hours, weeks, months staring at an inanimate collection of parts, the drawings, the conversations, the decisions the waiting. For that much of you life invested to become a living, rideable object of desire. And it is: people go weird when they see it, dog walkers on the lanes stop you to ask what it is, visitors to the workshop who have seen its creation stood quiet at the sight of it.” -Jake Robbins
Read on for Jake’s full rundown of the journey from biscuit tins to running SS100, with more photos courtesy of Gary Margerum (@garymaregrum) and Hoxton Moto.
Brough Superior SS100 Alpine Grand Sport: In the Builder’s Words…
There’s always a great story when it comes to building a bike like this, in this case it’s partly a personal one of years of training not just in the skill of the craft but also in the study of another man and his company’s achievement of designing and building one of the most iconic motorcycles of all time the Brough Superior SS100 Alpine Grand Sport.
For me this one started about 15 years ago when I began building replica Castle forks for a couple of clients — one building up an original Brough Superior SS80 missing its forks, another building a replica SS100. Once the Brough fraternity saw I could produce a faithful but slightly modified for strength set of Castle forks the orders began to accumulate along with a very steep learning curve of how Brough Superiors were produced. I tried to build the orders in a production style but soon discovered that very few of the Broughs built during the 1920s era were the same; it seemed the models built during the 20s were in perpetual development or being built to order. Perhaps George Brough was the pioneer of custom building — a conclusion I am sure I am not the first to come to…
With the acquisition of the necessary skills, contacts, workshop equipment, and the addition of my eldest son, we began repairing early cast lug frames, this in turn led to building new complete frame orders. We began to take on pre-war restorations and special builds, fitting JAP DTZ 1300cc stationary engines into Norton 16H frames, BSA Gold Star engines into War Department M20 chassis. These bespoke builds require engineering, fabrication, connections with likeminded trades, and an eye for the pre-war era aesthetic. Why am I waffling on? Because this is all leading up to what was to become a once in a lifetime restoration opportunity…
I had heard about one man’s collection of 1920s Brough Superior SS100 parts that had been collected over a number of years from auctions, autojumbles, and private sales but never put together. The project had stalled until my client purchased it without knowing quite what he was getting himself into. With all the parts of the bike delivered, I began to examine and assess the components for suitability, originality, and condition. I sifted through a multitude of vintage biscuit, dried milk, and shortbread tins filled with used nuts, bolts, springs, brackets, and fixings. There were crates filled with gearbox gears and shafts, cardboard boxes that had been transported and stored for so long they’d given way to expose their hidden treasure…or rubbish/detritus.
According to the V5 this bike was registered in 1927 and is a mighty SS100 Alpine Grand Sport.
Assessment and Report:
There is a complete frame but it has clearly been “worked on” — there are some poorly done repairs and damaged tubes soldered into the cast lugs. There are some original Royal Enfield hubs; these were considered the best hubs and brakes of the 20s and were used by Norton, Coventry Eagle, Montgomery, and many more as they had a whopping 8” drum brake. The rear cush drive hub is damaged but repairable, the front hub will be good to go after a skim on the brake surface. There appears to be no brake plates or shoes or actuator cams..
In one of the boxes I find some sawn up, what appear to be original Castle forks; there’s nothing left of them that is really usable apart from the main top lug.. There is a damaged but pretty original looking front mudguard, a well repaired petrol tank complete with the beautiful twin filler caps, and an oil tank in need of work.
There is a very hard to find complete, good looking three speed, four stud Sturmey Archer heavy weight gearbox with a paper tag tied to it saying it had been checked and was good…bloody hope so as this is beginning to look like a huge task! There’s no sign of a clutch or anything to do with a primary drive other than some rusty clutch plates and a knackered single centre clutch spring.
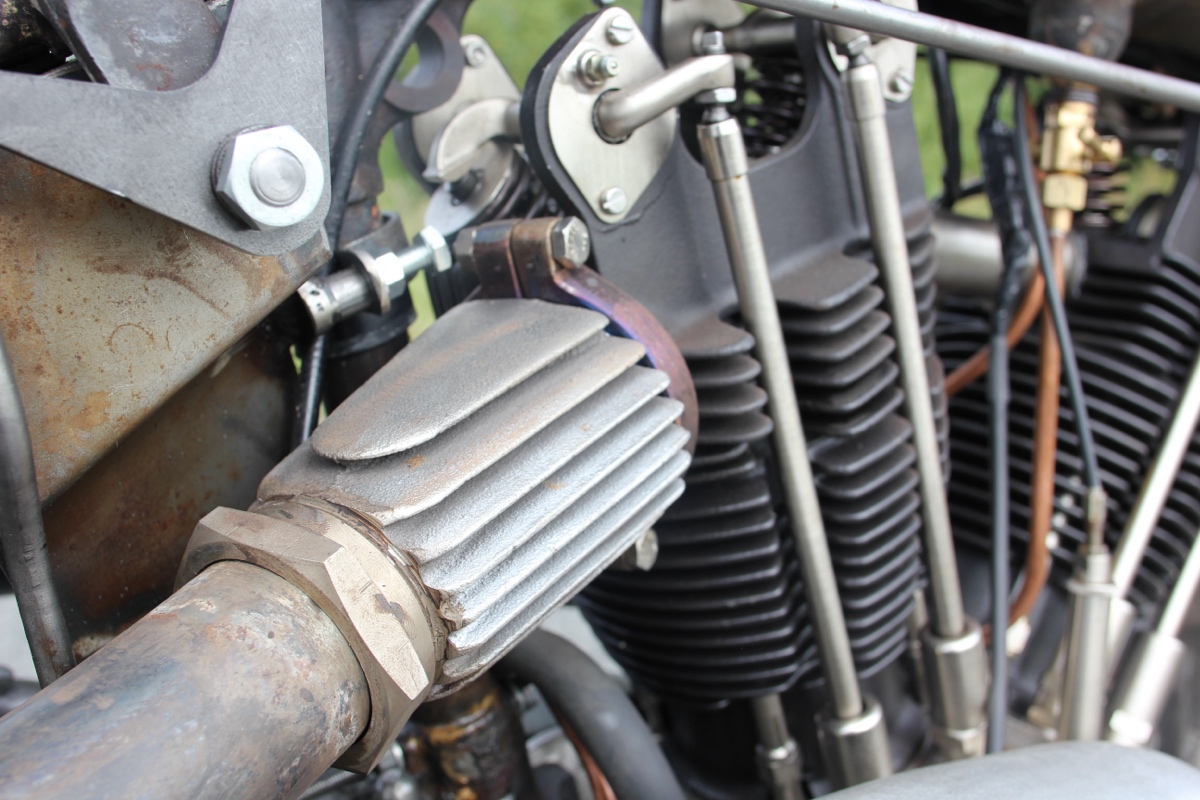
There is a set of Jap crank cases in what looks to be good condition, a pair of cylinder barrels and a pair of cylinder heads that all look to useable but will need a rebuild a very good sign indeed. There are some magneto bodies that look like they have spent their lives in a cement mixer drum and some oil pumps in a snap bag marked “needs work.”
So the bones of the bike are coming together and I begin to formulate a plan on how and who, it’s clear that some of the work involved should be delegated, as we specialise in chassis and have a serious amount to do on this project along with our usual everyday work load. I begin to reach out to other vintage specialists for the engine build, magneto, dynamo, oil pump and a host of missing parts.
I give the motor parts back to my client and send him on his way to visit Ewan Cameron of Cameron Motorsports in Malvern — he is the top JAP engine specialist. Next on the phone to the guys at BTH Magnetos to order one of their electronic mags to be built up of the JAP engine along with supplying an Alton 12v generator to be sent directly to Ewan for fitment to the motor.
We make a call to Pete at Pete’s Bikes in Cambridgeshire with regards to building a new pilgrim oil pump — he builds beautifully engineered new pumps. Again once finished it is sent direct to Ewan Cameron for fitting and testing.
Wheels and Brakes:
We repair the hubs. We have made the Enfield brake plates in the past for other projects so we laser cut some new plates and torque arms and rivet them all together. I manage to borrow an original brake shoe which we have CAD drawn; this is then 3D printed into a pattern for casting and sent to one of the best non ferrous foundries in the UK for casting into aluminium LM25 grade; this is then heat treated for stability during machining.
We set about machining the shoes in-house to match the brakes plates. We then draw and machine all the other pintals, brake shoe cams, cam blocks, cam cages and actuator arms. It goes on for weeks; you wouldn’t believe how many small parts are involved with one of these brakes and none of it is available, so we spend weeks on this part of the job. Once we are happy we have a working brake, we send the shoes off to have linings fitted. Once they are fitted we machine each set of shoes mounted on a dummy brake plate to match the brake drum it is fitted to… Phew once this is out of the way, bearings are sourced for the hubs and we machine up front and rear wheel and spindles and spacers, and the hubs are then painted black.
The hubs are sent off for a set of rims, 21” front and 20” rear. It should be 21” rear but rear tyre choice is so limited and our aim is to build the best ridable, reliable bike possible.
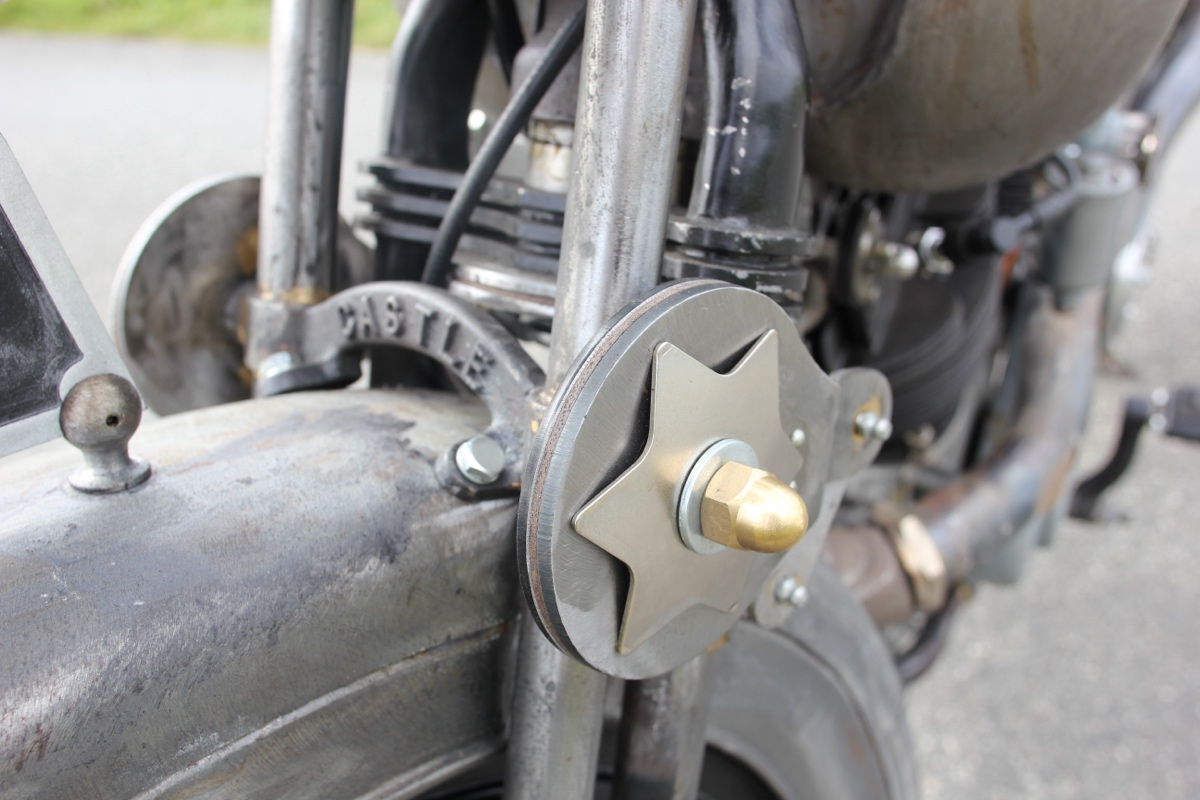
We decide to build the bike a completely new set of forks for safety reasons. Castle forks were prone to bending or even breaking as they were really designed for lighter bikes than the SS100. The design of this type of fork was first seen on an FN in the early 1900s. It was then copied by Harley-Davidson in their early years, then George Brough began to fit Harley-made forks, then he had them made in the UK using the same design but adding the stunning looking side friction damper system and the Castle name emblazoned on the front!
The Frame:
The majority of the castings look very good but it has clearly been messed with as the frame dimensions are incorrect; it has been broken or taken apart for modification and put back together with the wrong distances between centres. We start by sawing out the bodged tubes. We set each one up on the Bridgeport mill and carefully re-machine all the tube sockets. This takes a lot longer than sweating out the tubes (heating the lugs until the braze melts and the old tube can be pulled out). We prefer to machine them as it reduces stress on the castings and gives a clean reliable result.
After a couple of visits to a local original Brough owner who allows me to measure up their frame, I have enough information to completely rebuild the frame using the correct seamless tube; it is a lengthy process and requires some of the tubes to be either pre-bent and some to be bent in situ to allow for assembly. It’s a complicated job and requires a lot of measuring, sweating and cursing… We have invested in a fabricating jig table, and in addition to this we have designed our own attachments for it; they hold frames in alignment while we braze them together for better accuracy.
With the frame and forks completed and the motor built and bench tested its assembly time…
I repair the damaged front mudguard and source a new blank for the rear. It requires both of the exquisite valances to be made. I do this with a plywood template that’s then used to form the wired in edge. Each mounting bracket is then hand formed and riveted into place. The front mudguard has a fiddly mounting system that incorporates the front stand; again this system his designed, machined and hand fabricated in house to ensure correct alignment detail…it’s painstaking work..
Fortunately there are some new rear stand lugs in the collection of bits so I fabricate a complete new rear stand along with spring mounts.
Wheels arrive and fitted with Avons front and rear… Blimey a rolling chassis at last, the hours that have gone in so far are crazy!
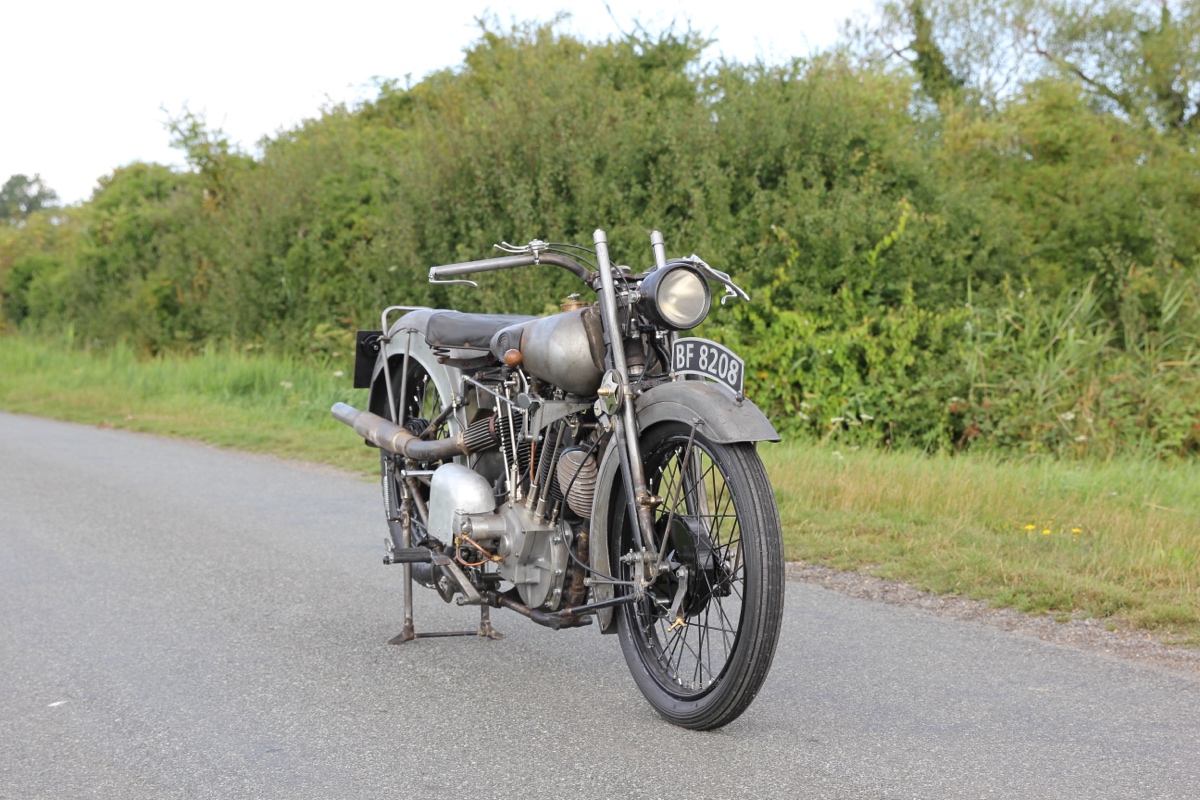
Engine plates and frame bolt kit machined and motor is fitted and then it’s on to the exhausts. The Brough club spares scheme come up trumps with a beautifully made set of high level silencers and link pipes. The oh so stylish exhaust coolers are sourced from a friend in the trade who is also kind enough to sell me the original headlamp; purists will tell you it should be fitted as a pair but I think it works and fits in well with the sleek front end.
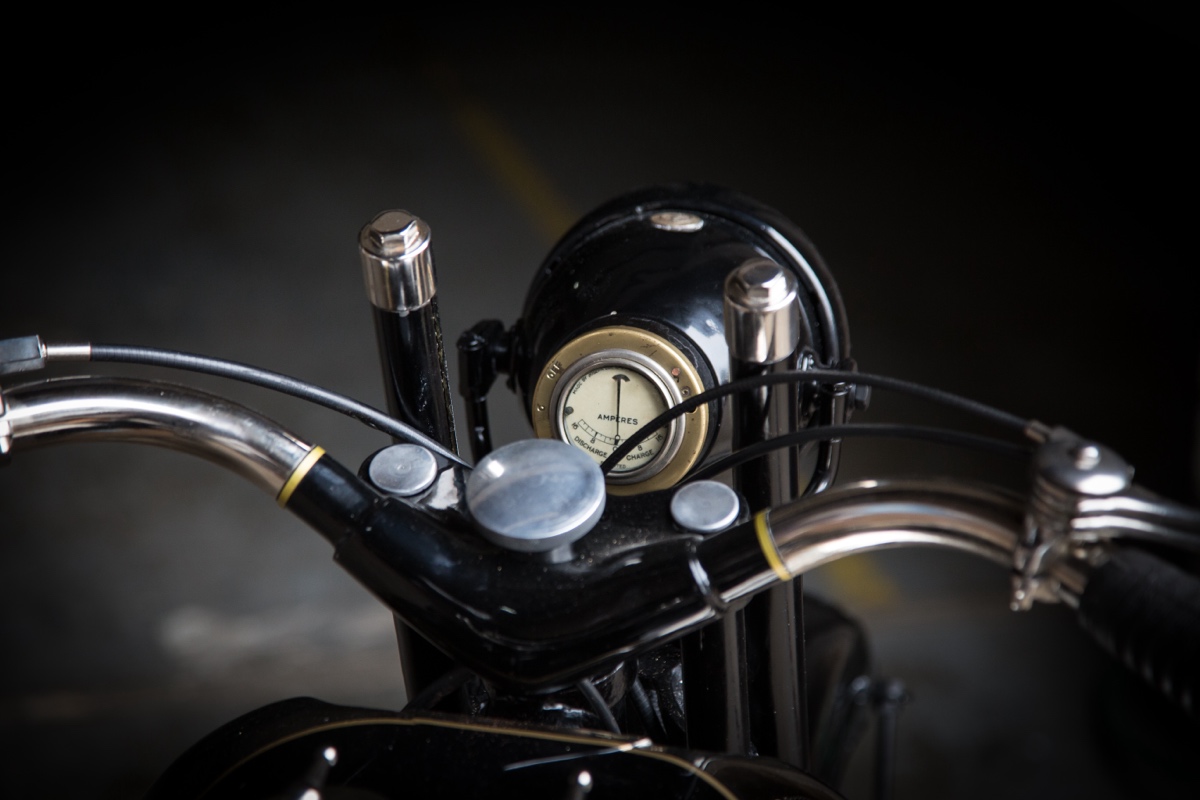
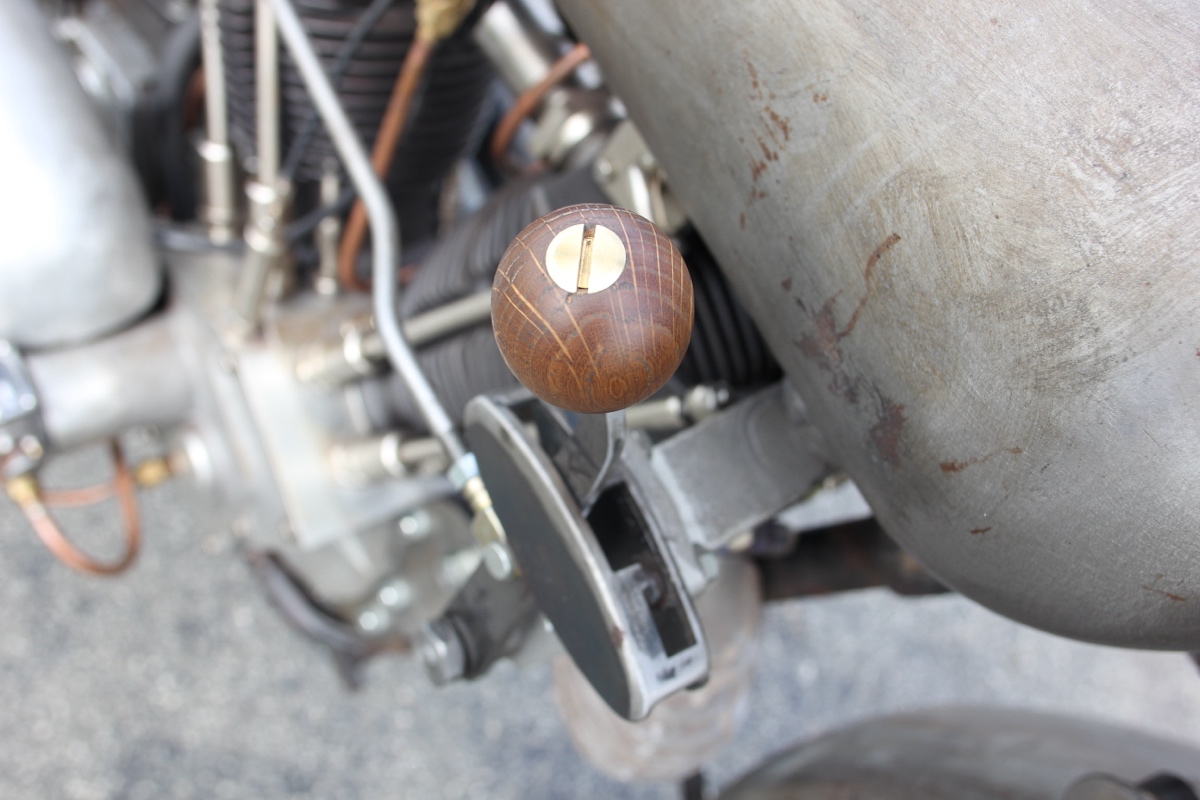
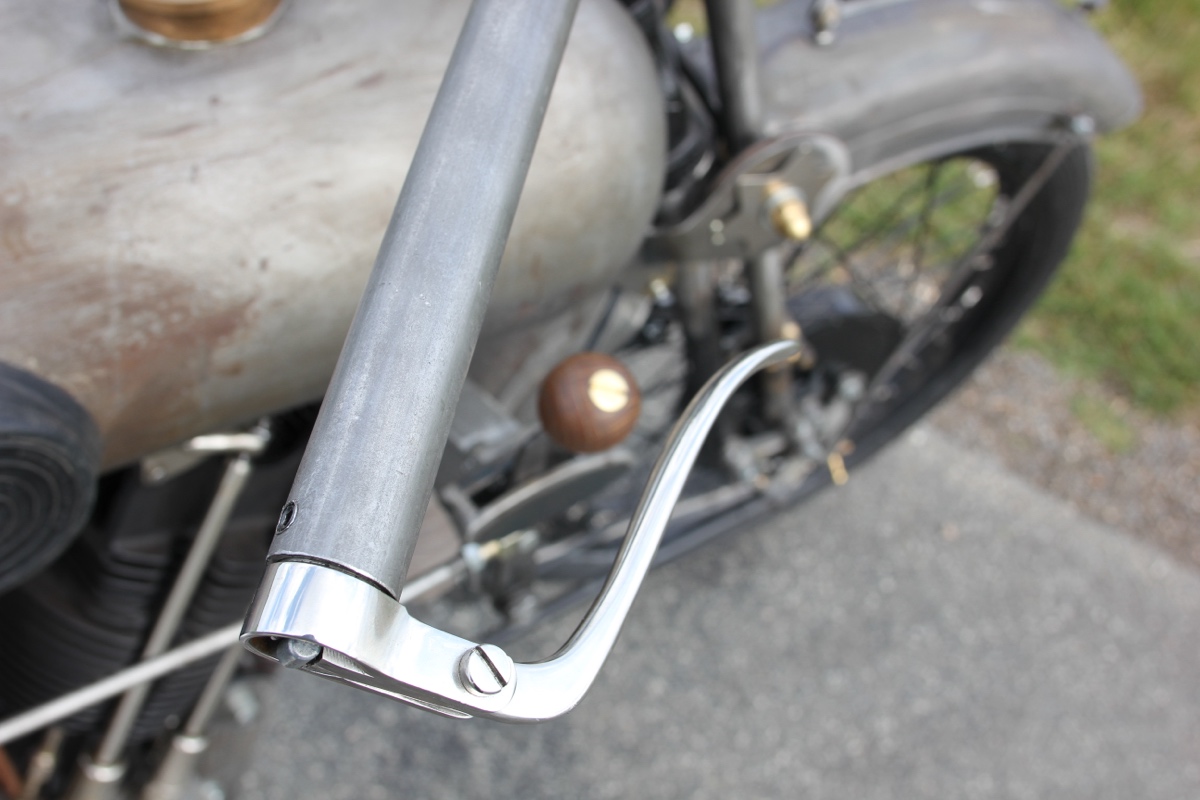
A set of stainless steel levers are purchased again from Pete’s Bikes in Cambridge… It’s really coming together but there are so many more details to get this bike over the line. Brough used some very stylised one-off parts that simply are not available, so I set about machining the tiller nuts, a complicated boat wheel style front brake cable adjuster that is made from six individual parts turned, cross drilled, and soldered together. Front number plate mounts are one-offs, all hand fabricated, cross drilled, tapped, slotted… The number plates are CAD drawn and CNC cut from aluminium before being blasted to soften them.
The gearbox is fitted with no real drama. We screw cut the linkage system up to the hand shifter via the fulcrum under the seat to the shift gate — again from the club spares. We decide to buy a speedway clutch from NEB engineering, as they are designed to have 70 hp smashed through them in competition use. We have it ceramic coated in black to blend it in with the rest of the machine. We machine up a crank boss with an internal taper and TIG weld on the front primary drive sprocket.
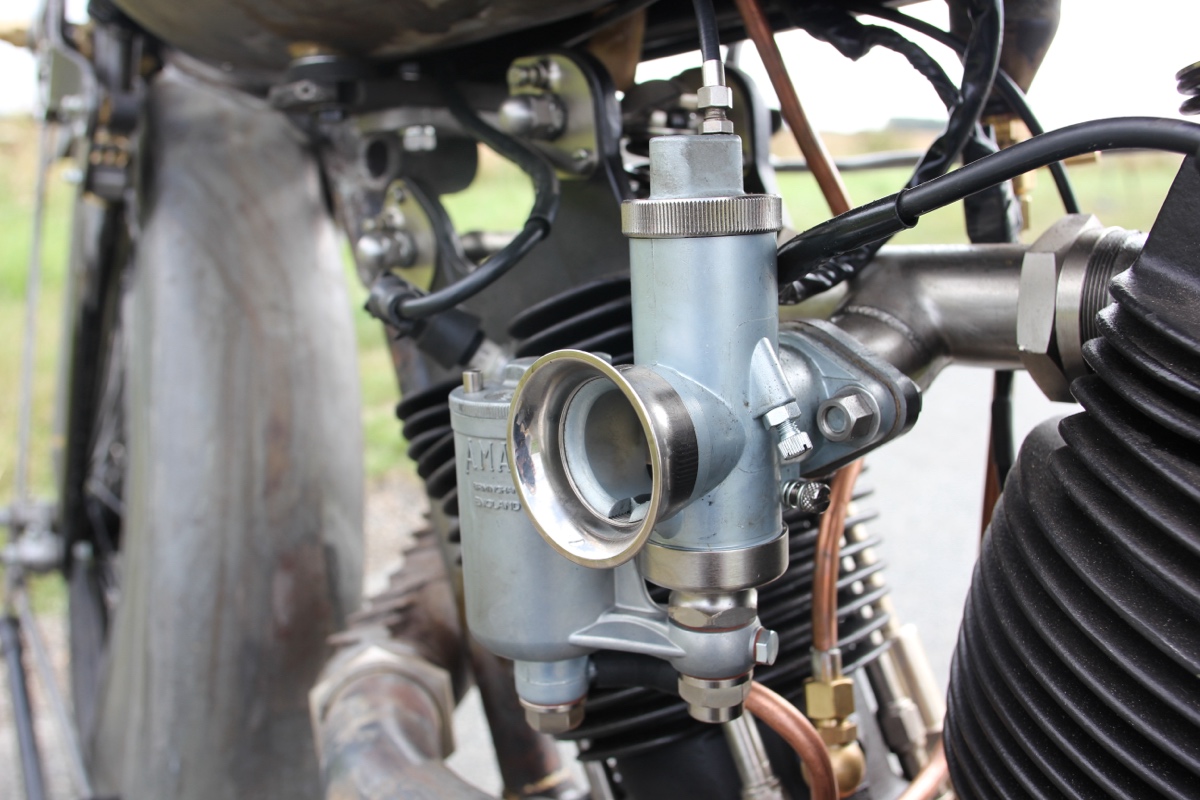
A new Amal 276 as per instructions from Ewan is purchased and fitted; we make and fit all the control cables and we are dangerously close to getting the beast running.
The coils and CDI unit are small enough to fit under the petrol tank. So a set of brackets are made up to hold them in place and out of view.
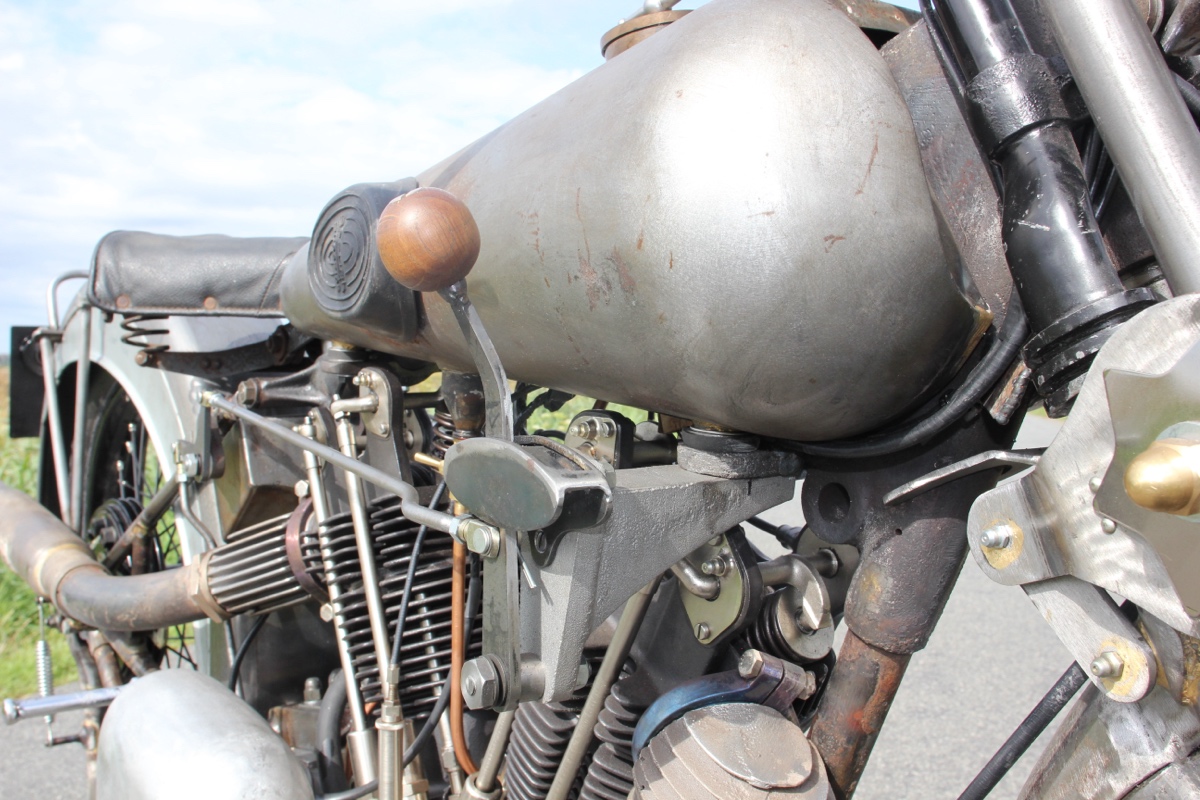
We set the fuel tank in place and weld on the bolt bosses along with soldering on the knee pad securing plates, there a nice set of reproduction rubber knee pads in with the spares with the marques name embossed on.
Brass period correct petrol taps are purchased along with a bag of BSP fittings and a roll of copper pipe. We fill the copper pipe with water, roll up each end until the water is under pressure then the pipe can be hand bent into shape without the walls caving in, the rolled ends are then cut off and the finials can be soldered on. This process is carried out on the fuel, oil, and cylinder breather.
A complete set of cables is made up, sounds easy enough? The decompressor and front brake cables are routed through the handle bars giving rise to fun and games judging length and somewhat guessing routes!
When you’re getting toward the end of a build where everything has been handmade, machined, sanded, filed, reamed, welded, brazed — and some parts you made in the beginning of the build rendered useless by the introduction of a final part, causing a re-design, and each part eased together — the home stretch is well a stretch. It seems you are fitting and refitting parts in order for them to fit and work in harmony and to do justice to the Brough name…and to know when the owner takes ownership there are no predictable issues or oversights.
Fuel and Oil:
In with a jug of petrol in the petrol tank and half a gallon of oil in the oil tank, bleed the oil through to the oil pump, tickle the carb, pull in the decompressor and swing… The tension is palpable. Hundreds upon hundreds of hours of labour, begging, guessing, and years of learning have got me to this point — oh and invoices. Drop the decompressor, there’s no advance or retard as it’s mapped on the electronic ignition after four swings the motor fires and revs spontaneously with a soft but huge, glorious bellow from the twin pipes. Pushing the thumb operated throttle lever back against the stop and it immediately settles onto tick over as if the motor has been been built and tuned by a maestro…well it clearly has been.
Other than a weep on an oil line that is attended to that’s it, a running Brough SS100 stands before us. It starts very easily and it’s ready to ride. I push it out of our workshop into the spring sunshine, crash helmet on. Kickstart routine: in with the clutch, select first gear, and release the beast. So much torque, it surges forward with just a whiff of throttle on the lever, straight into second and out onto the hideous broken concrete excuse for roads littered with skip lorries, punters at the wholesale electrical centre backing their transits into the road pasty and phone in hand, articulated lorries reversing into yards. Your average day in any town’s industrial estate is probably not the best place to ride a Brough for the first time, but the bike is not what I expected.
With its super low centre of gravity, it steers beautifully, the light clutch and the carefully built brakes it is indeed a very controllable machine. It stops immediately, and due to the gem of a motor takes off with no fuss. I feel fully at home and at ease on it, not something I can say about other vintage motorcycles I have ridden in similar circumstances where they clearly want to hurt you…
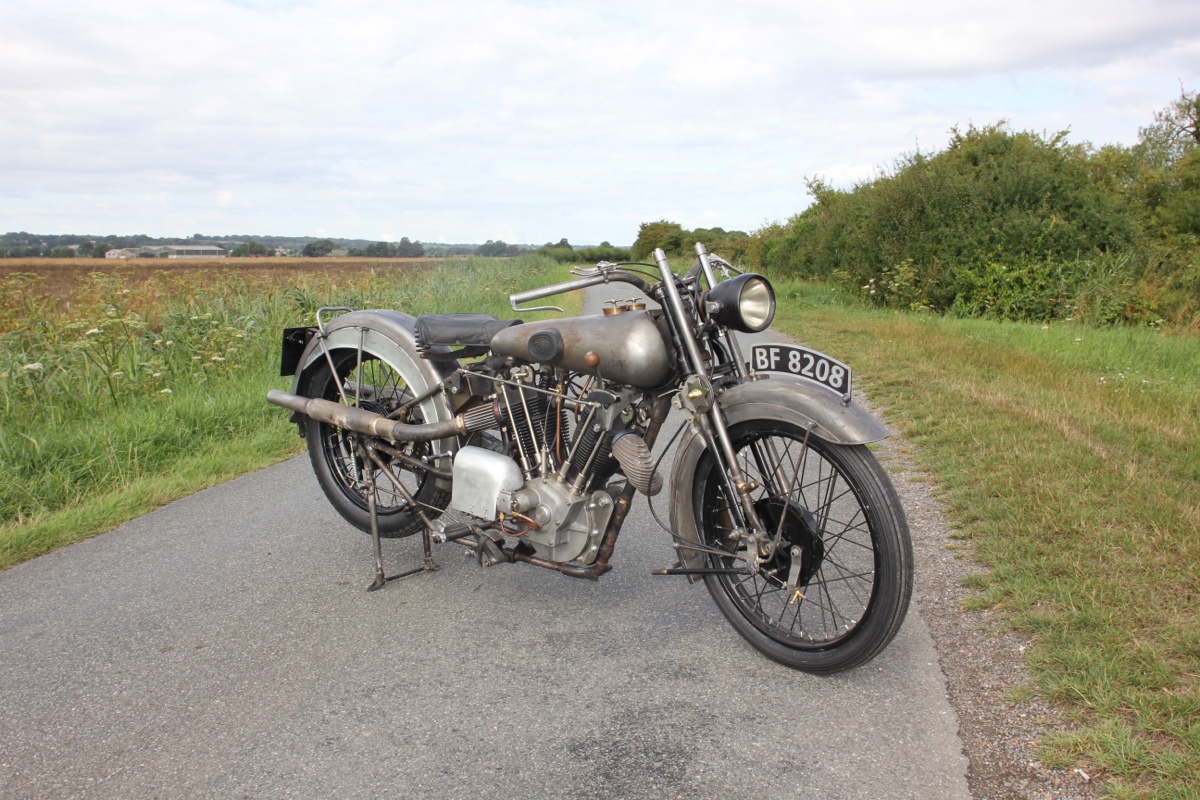
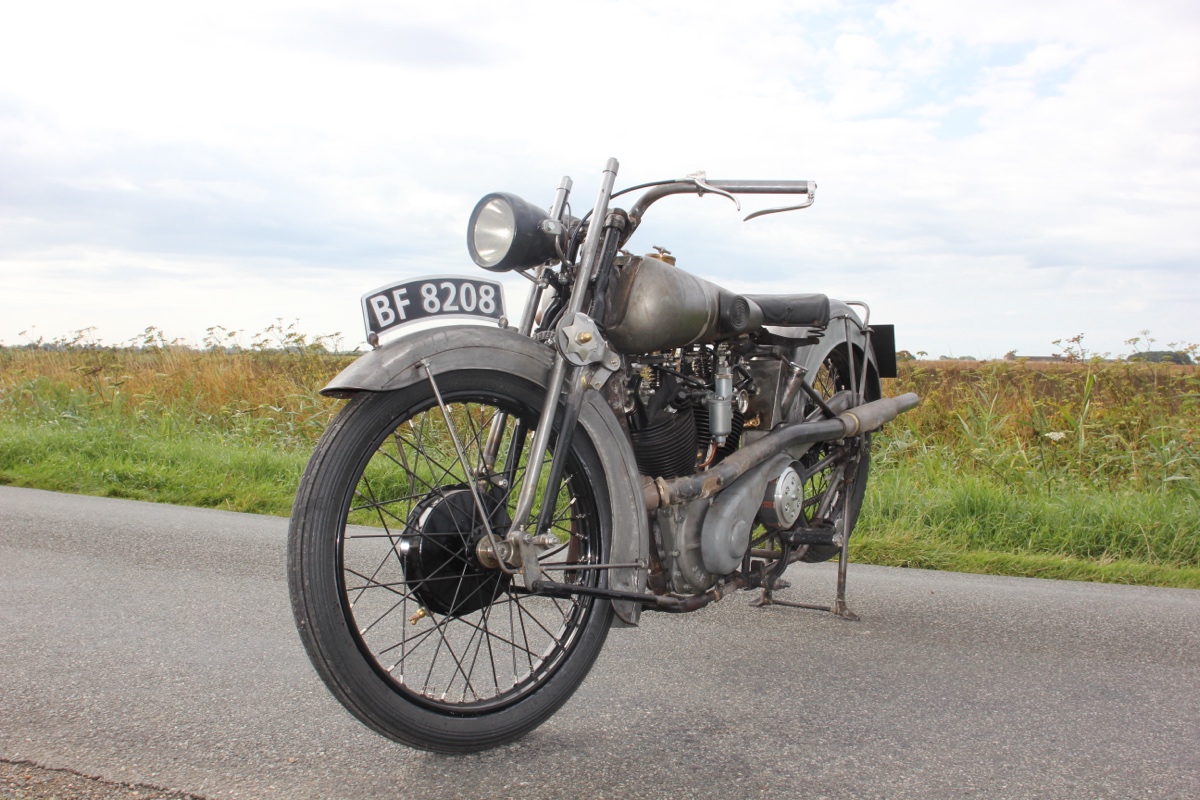
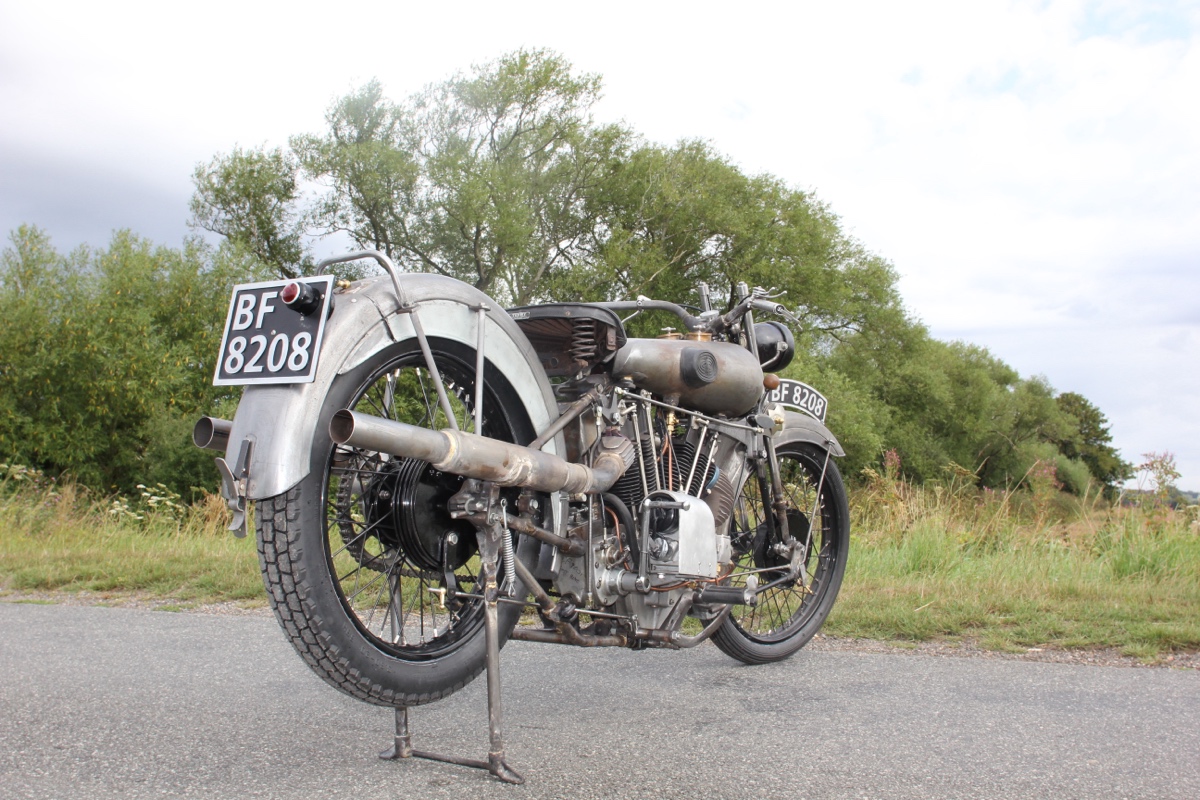
It’s clear a good few miles are needed to settle in the transmission; second gear is a bit vague and I can’t wait to get it out on some traffic-free roads to get into top gear and up to speed. In the next few days we load the bike into the van and take it out to some isolated lanes on Romney Marsh. The sun is out and a dear friend of mine comes along to take some pictures and make a short film. It’s the last time it will be in the raw — there’s not a drop of paint on it apart from the wheels that we had painted before assembly. There is nowhere to hide when there’s no paint, filler, or plating to cover one’s indiscretions. You can see every brazed joint, every welded seam, each file mark where tube transitions into a cast lug.
The shakedown test ride goes very well. It’s hard to put into words the feeling you get from riding a motorcycle you have built, especially after all those hours, weeks, months staring at an inanimate collection of parts, the drawings, the conversations, the decisions the waiting. For that much of you life invested to become a living, rideable object of desire. And it is: people go weird when they see it, dog walkers on the lanes stop you to ask what it is, visitors to the workshop who have seen its creation stood quiet at the sight of it.
Everything works as it should, and really considering the amount of hours William and I spent meticulously building this bike and the sheer quality of the parts supplied by the best in the UK, so it should!
With the bike back in the workshop it is stripped completely ready for paint and nickel plating. I catalogue every nut, bolt, and washer as they are all different lengths and thread types. The fasteners, linkage rods, clevis connectors, rear sprocket, and clutch assembly are going to be ceramic coated in satin black — it’s as close a finish to the black they used on the original fasteners. It is tough and so thin that a bolt will still pass over a coated thread.
All parts for plating are sent off and William sets up to prepare the rest for paint. We decide to paint everything apart from the petrol tank in-house; William has picked up the paint skills and we set about preparing and masking what seems like a million parts! All goes well with the paint. We aim for deep oily black, not too glossy as we are trying for a stove enamel type sheen, somewhere between satin and gloss. Yes I’m over thinking it but I believe it is worth striving for… Nickel plating and ceramic coating are back from our trusted contractors. The petrol tank is painted and coach lined by Matt at Alchemy Paint here in Hastings.
The final assembly is straightforward enough and once completed William designs and builds a bespoke wiring loom. We use low draw 12v LED front headlamp, a glass matte gel battery hidden in a period-correct Lucas battery carrier with rubber battery skin. This is linked to the new Alton generator via a rectifier hidden under the petrol tank. Wiring is wrapped in cloth tape and we are done.
There is so much more that could have been told about this build, especially the technical process and some of the characters who were involved but remain nameless by their own request. I feel William and I have done justice to the Brough name. We have aimed to build a bike for riding not hiding. We took on some of the issues the age of these bikes present, with most parts used being replaceable or repairable, so this bike like its predecessors can go on for the next hundred years…
I would like to thank first and foremost my family, William who put in countless hours and put up with my moaning, Ewan Cameron for the engine and set up, Pete’s Bikes in Cambridge, Mike Smith at the Brough Club Spares, Simon Miles for advice and derision in equal measure, Matt at Alchemy Paint, BTH Magnetos, Rex’s Speed Shop, Simon at Renovation Spares, and last but not least David Saunders who believed in my ability, and who has been unwavering in his support for the project.
Follow the Builder
Jake Robbins Vintage Engineering
Tel: 07986254144
Web: www.jakerobbinsvintageengineering.co.uk
Facebook: @jakevintage
Instagram: @jakevintage
Follow the Filmmaker
www.youtube.com/hoxtonmoto
www.hoxtonmoto.com
[email protected]
www.facebook.com/hoxtonmoto
www.instagram.com/hoxtonmoto
www.twitter.com/HoxtonMoto
Photography Credit
Painted photos by Gary Margerum (@garymaregrum).
Raw photos by Hoxton Moto


